Clean Detox Plan: Dinners

0 comments


Dr. Oz Shepherd's Pie

Ingredients

Serves 2

10 cups cauliflower florets, steamed soft
1 tsp salt
2 tbsp unrefined virgin coconut oil, divided (more or less if needed)
2 cups roughly chopped broccoli florets
1 small bok choy, roughly chopped (about 2 cups)
8 oz poached chicken, diced
Freshly ground pepper

Directions

Preheat the oven to 400°F degrees. Purée the cauliflower, 1/2 teaspoon of salt and 1 tablespoon of the coconut oil in a blender until very smooth. set aside. In a medium pan sauté the broccoli for 2 minutes in 2 teaspoons of coconut oil, until lightly browned and starting to soften a bit. Transfer to a bowl and cook the bok choy for 2 minutes, in the same pan, adding a little more of the coconut oil if necessary, until starting to brown. Transfer bok choy to the bowl with the broccoli. Add the diced chicken, 2 cups of cauliflower purée, 1/2 teaspoon salt and freshly ground pepper and gently toss. Transfer mixture to a 4 cup baking dish, top with the remaining cauliflower purée and bake for 20 minutes until hot and bubble. If you like to brown the top a bit, broil for a few minutes after baking.

Clean Detox Plan: Breakfast Shakes

0 comments


Clean Detox Plan: Breakfast Shakes


Berries + Greens Shakes

Ingredients
1 cup frozen berries (blueberries, raspberries, etc.)
1 to 2 loosely-packed cups of spinach
2 cups coconut milk
1 tbsp coconut oil
2 heaping tbsp plant-based protein powder


Directions
Blend until smooth.

Clean Detox Plan: Snacks

0 comments


Green Lentil Hummus

Ingredients

3 cups vegetable or organic chicken stock/broth
1 cup green lentils
1 bay leaf
3 garlic cloves, chopped
1/2 cup tahini
Juice of one lemon
1/2 tsp cumin
1/2 tsp paprika
Sea salt to taste
Vegetable and apple slices for dipping

Directions

In a medium saucepan, combine chicken stock, green lentils, and bay leaf. Bring to a boil and then cover and simmer until lentils are tender, roughly 40 minutes. Then boil uncovered until most of the liquid is gone. Remove the bay leaf and set aside to cool. When it’s cooled off, transfer to food processor and blend with garlic, tahini, and lemon juice until smooth, adding sea salt and other spices (cumin and paprika) to taste. Serve warm or at room temperature with the vegetables, or you can store in the fridge to use as needed throughout the week.

Hamburger Helper Sushi Rolls

0 comments


Hamburger Helper Sushi Rolls


Hamburger Helper Sushi Rolls    

It’s fun to play with your food sometimes.

I particularly like taking some good old hearty comfort food (like mac and cheese, for instance) and dressing it up to make it seem classy or elegant. In this case, the target was Hamburger Helper, so I rolled it up to look like a fresh rolled piece of sushi! These cute little rolls would be the hit of any party.
But how can you achieve such a feat? Hamburger Helper is thick, but not THAT thick. I employed two little tricks to get it into the shape I wanted: a pinch of unflavored gelatin, and the good old freezer!
Want to impress your friends with a new twist on a classic? Try out this Hamburger Helper Sushi Roll recipe!

Making Hamburger Helper
Start by making Hamburger Helper according to the box instructions.

Use half the amount of water the recipe calls for
Well, almost. Use half the amount of water from the package.

Stirring in a teaspoon of unflavored gelatin
After it is done and off the heat, stir in a teaspoon of unflavored gelatin.

Blanched and shocked green beans
Blanch and shock some green beans and set aside for later (boil in salted water for about 5 minutes, strain, and dip in some ice water).

Hamburger Helper and green beens ready to roll into sushi
When the Hamburger Helper is cooled to room temperature (about an hour), lay out a rectangle on plastic wrap. Top with your green beans.

Hamburger Helper and green beens rolled into cylinder
Roll into a tight cylinder.

Hamburger Helper and green beens in cylinder, out of freezer after two hours
After a few hours in the freezer it will be an almost rock hard log.

Coating sushi cylinder with sweet potato chips
Cut off the ends, and coat in some potato chips.

Hamburger Helper Sushi Rolls, ready to eat
Slice it up the rest of the way and lay them out on a plate. Don’t eat them frozen though! Pop the whole plate into the oven at the lowest possible setting. Cook about 15 minutes until it is just warmer than room temperature. Warning: there is a fine line where these will become too soft to pick up with chopsticks or your fingers. At room temperature they will be fine, and slightly warmer is ok too, but any hotter and they will start to fall apart.

Clean Detox Plan: Lunches

0 comments


Clean Detox Plan: Lunches


Ingredients

Serves 2

2 tsp unrefined virgin coconut oil
2 8-oz halibut filets
4 large leaves dark green lettuce leaves
1/2 cup shredded cabbage

Salsa

1/2 cup blueberries
1/4 cup raspberries
Juice of 1/2 lemon
1/3 cup finely chopped bok choy
Salt and pepper to taste

Directions

Salsa: in a small bowl stir all ingredients together and set aside.

Tacos: Cook the Halibut in the coconut oil about 3 minutes per side, remove from the pan and gently break up into large bits.

Top each lettuce leave with a fish portion, sprinkle with some shredded cabbage and finish off with some salsa.

Serve with a wedge of lemon on the side.

opera cake

0 comments

 opera cake

the daring bakers: we knead to bake


As most of you have figured out, I *am* a Daring Baker. Daring Bakers kick ass and they are also spreading like a virus through the food blogosphere. If you aren’t a Daring Baker (all two of you who are left) then you will be assimilated soon enough… oh yes… you will be. This month’s challenge is: The Opera Cake. Our hosts for the challenge are our beloved Daring Bakers’ founders Lis (La Mia Cucina) and Ivonne (Cream Puffs in Venice), and two of our newer DB members Fran (Apple Peaches Pumpkin Pie) and Shea (Whiskful). You can scope out all of the gorgeous Opera Cakes at the rest of the Daring Bakers’ blogs on the blogroll. Thank you, ladies!

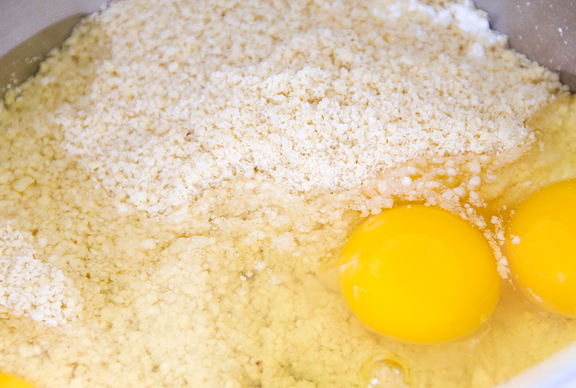
ground almonds are the base of the jaconde


Now I, like my fellow kickass betty, Peabody, was very excited to see the May challenge was L’Opéra. And I, like my fellow kickass betty, Peabody, swore when I read that it couldn’t be dark. Not morbid, mind you, but dark as in chocolate or coffee or cocoa. I have trouble thinking of an opera cake that doesn’t have that fantabulous dark chocolate glaze and tantalizing layers. Okay, but I’m a sport… mostly. I hemmed and hawed for several weeks over what flavors to select because honestly, I detest white chocolate.

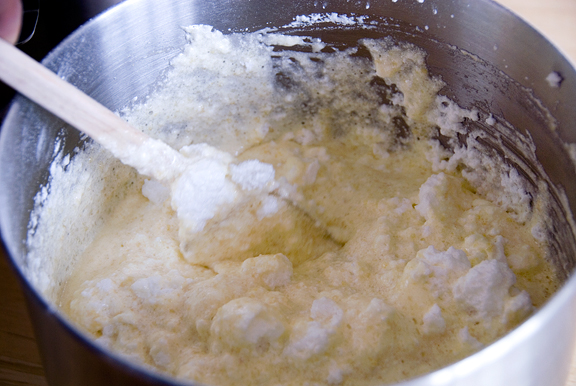
folding in the whites


I left the jaconde with an almond base as I had never tried it before – plus I am a huge fan of almonds. That was simple enough and came together as easily as a chiffon cake.
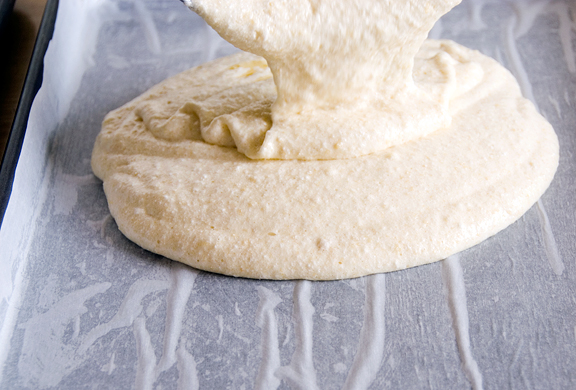
pour the batter


The first sign of trouble came when I decided to follow the instructions and bake both of my jelly roll pans in the oven at the same time. My oven is not an equal opportunity baker in that the bottom pan burned its base before the top pan even set. Surprisingly unphased, I decided to halve the recipe upon removing the cake from the oven. For the 
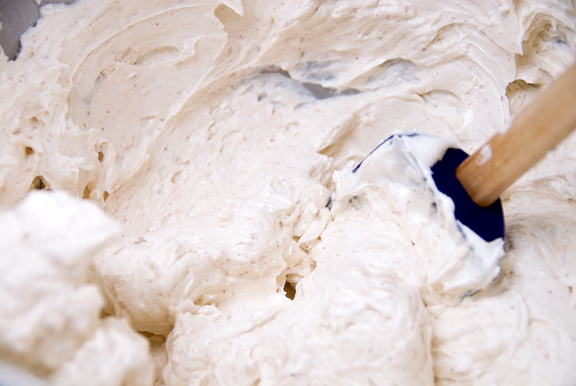
buttercream recipe, I resorted to my favorite Swiss meringue buttercream recipe, because it never fails me and we were given the freedom to make this substitution. I made a half batch and flavored it with Frangelico and a heaping tablespoon of hazelnut butter (from Whole Foods).

hazelnutty!


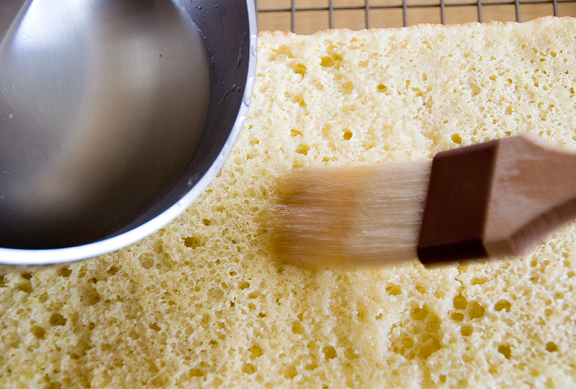
I flavored the simple syrup with Frangelico as well. My original plan was to have an orange-flavored (Grand Marnier) white chocolate mousse for my top layer, because I rather liked the combination of hazelnut and orange in this brittle. That tanked because my white chocolate separated too much (my fault – heat was too high) and the mousse never firmed up, insisting on remaining the consistency of vomit. Just reinforcing my already pissy feelings for white chocolate.

applying the simple syrup


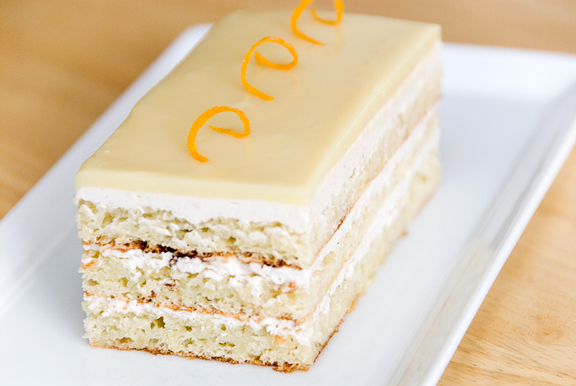
I left the glaze as a white chocolate ganache. In hindsight, I should have flavored it with orange and probably should have spread it as thin as humanly possible the way Tartelette did (she’s brilliant, no?). I just cannot stand the stuff. It’s too sweet and I feel it hijacks the other more subtle and pleasant flavors of the cake. Damn you, white chocolate!

glazing


I haven’t eaten the cake proper, only tasted the trimmings from the edges. I find the glaze to be narsty, but the rest of the cake is wonderful once you scrape the glaze off. Would I make this again? Not a white version and certainly not one with white chocolate, but I would most definitely go for a classic version with a twist.

hazelnut and white chocolate opera cake


Opera Cake
based on recipes in Dorie Greenspan’s Paris Sweets and Tish Boyle and Timothy Moriarty’s Chocolate Passion
full recipe

jaconde
6 large egg whites, at room temperature
2 tbsp (30 g) granulated sugar
2 cups (225 g) ground blanched almonds
2 cups icing sugar, sifted
6 large eggs
½ cup (70 g) all-purpose flour
3 tbsp (1½ oz; 45 g) unsalted butter, melted and cooled
Divide the oven into thirds by positioning a rack in the upper third of the oven and the lower third of the oven. Preheat the oven to 425F. (220C). Line two 12½ x 15½- inch (31 x 39-cm) jelly-roll pans with parchment paper and brush with melted butter. In the bowl of a stand mixer fitted with the whisk attachment (or using a handheld mixer), beat the egg whites until they form soft peaks. Add the granulated sugar and beat until the peaks are stiff and glossy. If you do not have another mixer bowl, gently scrape the meringue into another bowl and set aside. If you only have one bowl, wash it after removing the egg whites or if you have a second bowl, use that one. Attach the paddle attachment to the stand mixer (or using a handheld mixer again) and beat the almonds, icing sugar and eggs on medium speed until light and voluminous, about 3 minutes. Add the flour and beat on low speed until the flour is just combined (be very careful not to overmix here!!!). Using a rubber spatula, gently fold the meringue into the almond mixture and then fold in the melted butter. Divide the batter between the pans and spread it evenly to cover the entire surface of each pan. Bake the cake layers until they are lightly browned and just springy to the touch. This could take anywhere from 5 to 9 minutes depending on your oven. Place one jelly-roll pan in the middle of the oven and the second jelly-roll pan in the bottom third of the oven. Put the pans on a heatproof counter and run a sharp knife along the edges of the cake to loosen it from the pan. Cover each with a sheet of parchment or wax paper, turn the pans over, and unmold. Carefully peel away the parchment, then turn the parchment over and use it to cover the cakes. Let the cakes cool to room temperature.

syrup

1/2 cup (125 g) water
1/3 cup (65 g) granulated sugar
1-2 tbsp flavoring of your choice (i.e., vanilla extract, almond extract, cognac, limoncello, coconut cream, honey etc.)
Stir all the syrup ingredients together in the saucepan and bring to a boil. Remove from the heat and let cool to room temperature.

hazelnut buttercream

8 oz egg whites
16 oz sugar
1 lb butter, room temperature
2 tbsp Frangelico
2 tbsp hazelnut butter
Combine egg whites and sugar in a Kitchenaid mixing bowl. Whisk constantly over a bain marie until 140F is reached. Place on mixer with whisk and whip until stiff. Turn down whip speed to 3rd and whip until cool to the touch (this takes a while – should be cooler than your hand). Change to a paddle and gradually add soft butter by tablespoon pieces. Mix to emulsify. Once desired consistency has been reached, add flavorings and beat until incorporated.

glaze

14 oz white chocolate, coarsely chopped
1/2 cup heavy cream (35% cream)
Melt the white chocolate with the heavy cream. Whisk the mixture gently until smooth. Let cool for 10 minutes and then pour over the chilled cake. Using a long metal cake spatula, smooth out into an even layer. Place the cake into the refrigerator for 30 minutes to set.

Assembling the Opera Cake:

Note: The finished cake should be served slightly chilled. It can be kept in the refrigerator for up to 1 day.
Line a baking sheet with parchment or wax paper. Working with one sheet of cake at a time, cut and trim each sheet so that you have two pieces (from each cake so you’ll have four pieces in total): one 10-inch (25-cm) square and one 10 x 5-inch (25 x 12½-cm) rectangle. Place one square of cake on the baking sheet and moisten it gently with the flavoured syrup. Spread about one-third of the buttercream over this layer. Top with the two rectangular pieces of cake, placing them side by side to form a square. Moisten these pieces with the flavoured syrup. Spread another third of the buttercream on the cake and then top with the third square of joconde. Use the remaining syrup to wet the joconde. Spread the remaining buttercream on top of the final layer of joconde and then refrigerate until very firm (at least half an hour). Make the glaze and after it has cooled, pour/spread it over the top of the chilled cake. Refrigerate the cake again to set the glaze. Serve the cake slightly chilled. This recipe will yield approximately 20 servings.

Vanilla Cake with Strawberry Cream Frosting Recipe

0 comments


Vanilla Cake with Strawberry Cream Frosting Recipe


Let me start by saying, I’m a boxed cake kind of gal!  Actually when it comes to cakes and brownies, I rarely make ‘em from scratch. A boxed mix is just too easy! After seeing this Vanilla Cake with Strawberry Cream Frosting from Bon Appetit (May 2009), I thought I would venture outside of my comfortable cake mix box and go for it. I am so glad that I did because this is the best cake I have ever made!  Seriously, when I served it to my family, they all thought it tasted better than what you buy at a bakery. Plus, even though it requires quite a few ingredients, it really isn’t all that hard to make!


The cake was moist and perfect and the frosting was deeee-licious!  I’m not normally good at making homemade frosting either. I almost always use a can because normally most frosting recipes turn out like pure sugar and just don’t taste good. Not this one!  Seriously… BEST. CAKE. and FROSTING. EVER. It’s like strawberry shortcake but better. I just can’t say enough about this recipe.
Plus, it is the perfect Spring event or Easter cake! I made it for a family event this past weekend and it was a hit with everyone! If you like strawberries, you will LOVE this cake!

Vanilla Cake with Strawberry Cream Frosting

Ingredients:
Frosting -
  • 2 8-oz packages of cream cheese, room temperature (I used low-fat)
  • 1 cup (2 sticks) unsalted butter, room temperature
  • 4 cups powdered sugar
  • 1/2 cup seedless strawberry jam
  • 3/4 cup chilled heavy whipping cream
Cake -
  • 3 cups cake flour
  • 3/4 tsp salt
  • 1/2 tsp baking powder
  • 1/2 tsp baking soda
  • 3 cups sugar
  • 1 cup (2 sticks) unsalted butter, room temperature
  • 7 large eggs
  • 2 TBSP vanilla extract
  • 1 cup sour cream (I used low fat)
  • 6 TBSP plus 1/3 cup seedless strawberry jam
  • 2 1/4 lbs strawberries, hulled, sliced (about 6 cups), divided
MAKE THE FROSTING
1) Put a small/medium bowl in the freezer to chill.  In a separate large mixing bowl, beat cream cheese and butter until smooth. Beat in sugar, then jam. Remove that chilled bowl from the freezer and beat cream in that chilled bowl until peaks form. Fold whipped cream into frosting. Cover; chill for a couple of hours until it’s firm enough to spread. (If you are in a hurry, you could put the frosting in the freezer to chill quickly.)
MAKE THE CAKE
2) Preheat the oven to 325 degrees F. Butter and flour two 9-inch cake pans with 2-inch high sides. (I used 10″ cheesecake pans – aka springform pans – because they were the only round pans I had with high enough sides and they worked great!)  In a medium bowl, whisk together flour, salt, baking powder, and baking soda. In a large bowl, cream butter and sugar together until light and fluffy. Add eggs, one at a time, beating after each addition. Beat in vanilla. Add sour cream, and beat for 30 seconds. Add flour mixture in three additions, beating to blend after each addition. Divide batter into prepared pans.
2) Bake cake until a toothpick inserted into the center comes out clean, 50-60 minutes. Remove from oven and cool for 10 minutes. Run a sharp knife around the edges of the pans, then turn cakes out onto a rack to cool completely. I threw the two cake layers in the freezer for about an hour to make the cake assembly easier.
3) Using a serrated knife, divide each layer in half horizontally. Place one half, cake side down, on a cake plate.
4) Spread 3 TBSP of strawberry jam over the cake, then spread 3/4 c of the frosting over the jam. Arrange 3/4 c of the sliced strawberries on top of the frosting in a single layer. Repeat two more times with cake layer, jam, frosting, and strawberries.
5) Top with remaining cake layer, cut side down. Spread two cups of frosting over the top and sides of the cake in a thin layer, then frost with remaining frosting. Stir remaining jam to loosen, then spoon teaspoonfuls onto the top and sides of the cake. Use the back of a spoon to swirl jam decoratively into the frosting. This recipe makes a very big 4-layer cake that will feed a lot of people. It says it has 12 servings but I definitely think it feeds even more!

BEST. STRAWBERRY. CAKE. EVER.


Vanilla Cake with Strawberry Cream Frosting Recipe

 
Ingredients
  • Frosting -
  • 2 8-oz packages of cream cheese, room temperature (I used low-fat)
  • 1 cup (2 sticks) unsalted butter, room temperature
  • 4 cups powdered sugar
  • ½ cup seedless strawberry jam
  • ¾ cup chilled heavy whipping cream
  • Cake -
  • 3 cups cake flour
  • ¾ tsp salt
  • ½ tsp baking powder
  • ½ tsp baking soda
  • 3 cups sugar
  • 1 cup (2 sticks) unsalted butter, room temperature
  • 7 large eggs
  • 2 TBSP vanilla extract
  • 1 cup sour cream (I used low fat)
  • 6 TBSP plus ⅓ cup seedless strawberry jam
  • 2¼ lbs strawberries, hulled, sliced (about 6 cups), divided
Instructions
  1. FROSTING: Put a small/medium bowl in the freezer to chill. In a separate large mixing bowl, beat cream cheese and butter until smooth. Beat in sugar, then jam. Remove that chilled bowl from the freezer and beat cream in that chilled bowl until peaks form. Fold whipped cream into frosting. Cover; chill for a couple of hours until it’s firm enough to spread. (If you are in a hurry, you could put the frosting in the freezer to chill quickly.)
  2. CAKE: Preheat the oven to 325 degrees F. Butter and flour two 9-inch cake pans with 2-inch high sides. (I used 10″ cheesecake pans – aka springform pans – because they were the only round pans I had with high enough sides and they worked great!) In a medium bowl, whisk together flour, salt, baking powder, and baking soda. In a large bowl, cream butter and sugar together until light and fluffy. Add eggs, one at a time, beating after each addition. Beat in vanilla. Add sour cream, and beat for 30 seconds. Add flour mixture in three additions, beating to blend after each addition. Divide batter into prepared pans.
  3. Bake cake until a toothpick inserted into the center comes out clean, 50-60 minutes. Remove from oven and cool for 10 minutes. Run a sharp knife around the edges of the pans, then turn cakes out onto a rack to cool completely. I threw the two cake layers in the freezer for about an hour to make the cake assembly easier.
  4. Using a serrated knife, divide each layer in half horizontally. Place one half, cake side down, on a cake plate.
  5. Spread 3 TBSP of strawberry jam over the cake, then spread ¾ c of the frosting over the jam. Arrange ¾ c of the sliced strawberries on top of the frosting in a single layer. Repeat two more times with cake layer, jam, frosting, and strawberries.
  6. Top with remaining cake layer, cut side down. Spread two cups of frosting over the top and sides of the cake in a thin layer, then frost with remaining frosting. Stir remaining jam to loosen, then spoon teaspoonfuls onto the top and sides of the cake. Use the back of a spoon to swirl jam decoratively into the frosting. This recipe makes a very big 4-layer cake that will feed a lot of people. It says it has 12 servings but I definitely think it feeds even more!

Fesenjan - Persian Chicken in a Walnut & Pomegranate Sauce

0 comments


Fesenjan - Persian Chicken in a Walnut & Pomegranate Sauce


Fesenjan - Persian Chicken in a Walnut & Pomegranate Sauce
One of the great dishes of Iran!  In an Iranian home if a guest is to be honoured they are cooked this dish.  I highly recommend this dish, it is delicious!

Serves 4
Prep time:   10 minutes
Cooking time: 1 hour 45 minutes

Ingredients
4 tbsp olive oil
1 large onion, peeled & finely sliced
½ tsp turmeric
450g/1 lb walnuts, ground & reserve a few whole for serving
900ml/1 ½ pint chicken stock
1 tsp salt
½ tsp ground pepper
4 chicken legs
3 tbsp pomegranate molasses
2 lemons, juice only
50g/2 oz sugar

To serve
Basmati rice, cooked as per packet instructions
Method

1.  In a large frying pan heat 2 tbsp of oil and fry the onions and turmeric until soft and golden.  Remove with a slotted spoon and place in a large casserole.  Add the ground walnuts, chicken stock and seasoning.  Bring to the boil and then simmer for 20 minutes stirring occasionally.

2.  Heat the remaining oil in the frying pan and add the chicken, fry until browned all over.  Add to the casserole and make sure to cover with the sauce.  Cover the casserole and simmer for 1 hour stirring occasionally.  Skim any excess fat from the surface of the casserole.

3.  In a small bowl mix together the pomegranate molasses, lemon juice and sugar and add to the casserole, stir through and let simmer for another 20 minutes.  Season to taste, if needed.

4.  To serve, arrange the chicken on a bed of rice and pour over the delicious sauce, scatter over the remaining walnuts. 

The BEST Chocolate Cake Recipe Ever

0 comments


The BEST Chocolate Cake Recipe Ever

The Best Chocolate Cake
This has to be the BEST chocolate cake recipe, a chocoholics heaven!!  This is not for the faint hearted... it is beautifully moist & gooey!
Serves 14

Ingredients
The cake
200g good quality dark chocolate, about 70% cocoa solids (I always add a bit of milk chocolate)
200g butter, cut in pieces
1 tbsp instant coffee granules, mixed in 125ml cold water
85g self-raising flour
85g plain flour
1⁄4 tsp bicarbonate of soda
200g light muscovado sugar
200g golden caster sugar
25g cocoa powder
3 medium eggs
75ml buttermilk (5 tbsp)
grated chocolate or curls, to decorate
The  topping

200g good-quality dark chocolate , as above
284ml carton double cream (pouring type)
2 tbsp golden caster sugar
Your favourite chocolates or grated chocolate or curls, to decorate

Method
1.      Grease a 20cm round cake tin (7.5cm deep) with butter and line the base. Preheat the oven to fan 140°C/conventional 160°C/ gas mark 3. Break the chocolate in pieces into a medium, heavy-based pan. Place in the butter, then mix the coffee formula into the pan. Warm the mixture over a low heat until everything is melted.  
2.      Whilst the chocolate is melting, mix the two flours, bicarbonate of soda, sugars and cocoa in a big bowl, getting rid of any lumps. Beat the eggs in a bowl and stir in the buttermilk.
3.      Pour the melted chocolate mixture and the egg mixture into the flour mixture, stir until everything is well blended and you have a smooth and runny cake mixture. Pour this into the tin and bake for 1 hour 25 - 1 hour 30 minutes - if you push a skewer in the centre it should come out clean and the top should feel firm.  Leave to cool in the tin, then turn out onto a wire rack to cool completely. Don't worry if it cracks a bit or if it dips slightly.
4.      When the cake is cold, cut it horizontally into three, do not worry if the slice splits. Make the topping by chopping the chocolate into small pieces and tip into a bowl. Pour the cream into a pan, add the sugar, and heat until it is about to boil. Take off the heat and pour it over the chocolate. Stir until the chocolate has melted and the mixture is smooth.
5.      Sandwich the layers together with just a little of the topping. Pour the rest over the cake letting it fall down the sides and smoothing to cover with a palette knife. Decorate with chocolate of your choice, grated chocolate or a pile of chocolate curls.

Cooks Tips
v  The cake keeps moist and gooey for 3-4 days.

Strawberry Jelly Hearts Cheesecake

1 comments


Strawberry Jelly Hearts Cheesecake

When my colleague resigned last year, she had bought some jelly cheesecake for us. It was really yummy. She had ordered the cheesecake from online... So one of my colleague happened to came across this Jelly Hearts Cheesecake on the Sunday Straits Time. She said these cheesecakes looked very delicious, and I should try making them. And only it came across my mind that these were the ones I had eaten then.

These jelly cheesecakes were indeed a great treat for all. We all loved it very much as they were very refreshing.

Here are the cheesecake, strawberries were placed into the chilled cheese batter.
The jelly was poured over the cheese batter after chilling in the fridge for one night.
There we have, all chilled and ready to be photographed, and tested of course!!!
This jelly as recommended was Tortally, strawberry flavor. Very wobbly & yummy! The girls loved these jellies very much:-D
This cheesecake is definitely a keeper for those of you who loves cheesecake.
And here, the testers, including myself... what do you think?
Simply awesome, yummmmmmyyyyy......!!!!

Ingredients:

170g digestive biscuits, crushed
85g melted butter
250g cream cheese (room temp)
250g condensed milk
juice of 1 lemon
2 tsp gelatin
50ml hot water
1 punnet of strawberries
1 box of 90g Tortally Strawberry Flavoured jelly crystals

Method:

1. Crush biscuits till fine crumbs. Add melted butter and mix until well combined. Put the biscuit mixture in a 8" springform pan. Chill for at least 1hr.
2. Cream the cheese until smooth. Add in condensed milk & lemon juice, continue to mix until well combined. Add in the gelatin mixture(dissolve gelatin with hot water), continue to cream for 5 mins until well combined. Pour ready cream mixture into the pan, & chill for a while.
3. Place the cut strawberries, decorate as desired, into the cream cheese mixture. Gently pressed them into the mixture, so that the strawberries do not glide. Leave to set in the fridge overnight.
4. Prepare the jelly mixture as indicated on the box. Once cooled, pour the jelly solution to the cheesecake and put in back in the fridge to set.

Braised Brisket Stew

0 comments


Braised Brisket Stew


Post image for Braised Brisket Stew
The mere thought of cooking something slowly in the oven all day gets me excited!
This is my favorite type of cooking.  I’m talking about cooking that is slow and that completely transforms food into something even more flavorful and delicious.  This is comfort food kind of cooking.  You need to love flavor and cooking for this — and you need to have a considerable amount of available time.  This is what I love do — it’s cooking on the weekends!
Brisket is a tough cut of meat that needs hours to become tender.  Once it does, brisket is  incredibly delicious and it will melt-in-your-mouth.
My mom has been making brisket for as long as I can remember, and she always wings it.  And she wings it perfectly!  After years of interrogating her about her method (well, her method of winging it), I have come up with this scrumptious recipe.
While this Braised Brisket Stew is a brilliant addition to a Hanukkah or another holiday dinner, it’s also perfect for a super cozy, casual dinner party. Serve it over rice, pasta, mashed potatoes, or — my favorite way — with a thick, crusty, slice of roasted garlic bread.
Can you think of a more pleasant way to spend your weekend?

Braised Brisket Stew
Prep Time: 20 minutes
Cook Time: 8 hours
Active Work Time: 20 minutes
Serving Size: Serves 4 to 6
Recipe
1 (2-1/2-pound) brisket
2 tablespoons Worcestershire sauce
Olive oil for the pan
1 cup peeled Pearl onions
1 cup Peewee potatoes, washed, dried and cut in half
2 large carrots, peeled, and cut into 1/4-inch slices
1 cup frozen peas, thawed
1 cup beef stock
1/2 cup red wine
Sea salt and freshly ground black pepper
  1. Preheat the oven to 250 degrees F,and coat a large oven safe skillet (cast iron is perfect) -- or use a Dutch oven with olive oil.
  2. Rub the brisket with the Worcestershire sauce, coating it evenly, and season both sides generously with salt and pepper.
  3. Place the brisket, fat side up in the oil coated pan, and cover it with a fitted lid or heavy-duty foil. Place the brisket in the preheated oven for 6 hours.
  4. Remove the brisket from the oven, and place it on a large plate. (Leave any juices in the pan.) Let the brisket cool slightly, and then use the back of a knife or a spoon to gently scrape off the fat and discard it.
  5. Place the meat on a cutting board and cut it into thin (about 1/2-inch) slices -- against the grain! Set aside.
  6. Turn the oven up to 300 degrees F.
  7. Place the pan with the brisket juices on the stove over medium-high heat and add the onions. Once they're beginning to brown, add the potatoes and carrots. Cook the vegetables until they are all nicely browned, about 7 minutes.
  8. Move the vegetables to the sides of the pan and use a large, flat-bottomed spatula to return the sliced brisket to the center of the pan.
  9. Pour the stock and wine over the meat and vegetables and cover the pan. Place in the preheated oven and cook until the meat is extremely tender and the vegetables are soft, about 1 hour.
  10. Season generously with salt and pepper to taste.

 
  • flavor of cooking © 2012 | Designed by Rumah Dijual, in collaboration with Web Hosting , Blogger Templates and WP Themes